

AirPods have made waves in the world of technology. Thanks to Apple, the new era of audio began in 2016 when Apple released its first wireless headphones. Sleek, beautiful, and innovative, AirPods have been revolutionary.
Compared with other competitors, the Apple AirPods are a trendy choice. The minimalist design is popular amongst technology lovers, and its ease of use is incomparable. However, as with all technology, AirPods are no different.
Many users report their AirPods to have technical glitches. The most common ones are AirPods flashing green light and AirPods flashing orange light.
Read on to get the most from your AirPod experience.
Table of Contents
Common Problems With The Apple Airpods
The Apple AirPods are prone to many issues. You may have encountered issues when using your Apple AirPods if you are an Apple user. Check out the list below.
1. Losing the AirPods
The AirPods are known for their best feature, being wireless. However, many users have needed help with this.
It’s pretty easy to lose them, but luckily, Apple introduced a beeping sound to combat the problem, but there’s a catch: the Airpods need to be in their case.
2. Glitches in Playback
Many users don’t know that the AirPods use a W1 or an H1 chip, which can affect sound quality depending on interference and range. For example, WiFi can be troublesome for the W1 chip Airpods. However, Apple does claim that the AirPods have a range of over 100 feet.
3. Automatic Ear Detection Fail
AirPods are manufactured with a state-of-the-art proximity sensor; in essence, the device detects your ear and turns it on accordingly. However, many Apple users complained that they needed to reset AirPods a few times, and Apple experts recommend keeping the AirPods clean.
4. Connectivity Problems Via Bluetooth
As with many Apple devices, the AirPods are not any different. Frequent trouble persists when users want to connect their AirPods to their phones or other Apple devices.
Usually, the reset doesn’t take more than 15 seconds, but users have been disgruntled about the number of attempts it takes to solve the pairing error.
5. Charging Troubles
Apple is notorious for faulty cable wires; many AirPods users have complained about the same problem.
Most of the time, the lightning port on your AirPods case may have dust or some other glitch that inhibits charging. It is also recommended to switch cables if the first one doesn’t charge your AirPods.
6. Battery Drain
Many features can cause a battery drain, such as Automatic Ear Detection and being connected to a Bluetooth device for long periods.
Many Apple users have shared dissatisfaction with the battery drain, and some have spent a hefty $100 replacing the lithium batteries of their AirPods and AirPods cases.
7. Flashing Lights
Flashing lights are indicative of software or hardware issues. For example, some of the most popular searches related to AirPods are about AirPods flashing green and questions about different colored indicator lights.
In short, if your AirPods flash orange light, green flashing light, or amber and white blinking light, read on to know more.
The most pressing issue with AirPods is software and Bluetooth issues. The indicator light on the AirPods is a crucial feature that alerts users about what’s happening with their device.
Knowing about the status light is crucial and can save AirPods users a lot of hassle and money.
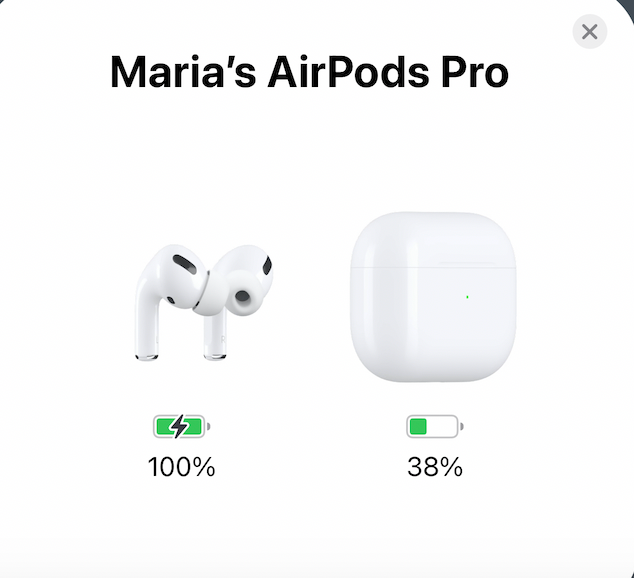
What Does the Green Flashing Light Mean?
For AirPods users, the flashing green light has been a problematic matter for a long time. As a result, some users assume the Apple device has run out of battery.
However, upon charging the AirPods and charging case, many realized that wasn’t the issue, so what does a flashing green light mean?
What Does It Mean?
The green light flashing means that one or both of your AirPods have become unrecognizable. This may result in connectivity issues, and you may be unable to connect them to your iPhone, Apple Watch, and other devices.
The status indicator alerts the user that the AirPods are ready to pair. However, a flashing green light means there is a problem. Perhaps one or both of the AirPods needed to be appropriately placed in the case when charging, or one of the AirPods has begun to malfunction.
However, some common reasons why this happens are described below:
- One or both AirPods have run out of battery
- The charging case has run out of battery
- Your iPhone setting is on mono, which means only one AirPod will work
- The AirPods or charging case may be malfunctioning
How To Fix The Flashing Green Light?
There are a few ways to correct the flashing green light problem. Read on to learn how to do this in a few easy steps.
Reset Your AirPods In a Few Easy Steps
To reset AirPods, you must first disconnect them from any Bluetooth device they are paired with. Next, go onto your iPhone or iPad and “Forget This Device.” If you are using a Mac, go to System Preferences, followed by Bluetooth and “Forget This Device.”
Next, carefully place your AirPods into the charging case and close the lid. Wait for 15 seconds. Then, press and hold the setup button until the indicator light flashes an amber light and then changes to a flashing white light.
You can now proceed to pair your AirPods with your Bluetooth device.
What Happens If My Device Does Not Flash Amber Light?
Some users have complained that the amber light does not flash when they attempt to reset their AirPods. In some cases, the LED light might be a white flashing light instead. If this happens, you don’t need to worry.
In this case, resetting your network settings on your iOS device is recommended. The following are the steps you can follow to reset the network settings and pair your AirPods again:
- First, on your iPhone or iPad, go to Settings and open the General Tab
- In the General tab, go to Network settings and press reset
- Next, disconnect your AirPods and go to Bluetooth settings; click “Forget Device.”
- You can now attempt to pair your AirPods again
If you prefer, you can repeat the steps highlighted in the section above. Chances are, the LED status light will flash amber and then white. This indicates that you are good to go.
I Did Not See the Flashing Amber Light; What Does That Mean?
Following the steps above, you will probably see the amber light before it turns white.
However, many users have reported not seeing the amber light, which is a cause for concern. Even after resetting the AirPods, some users had to try other measures.
In such a scenario, here’s what you can do. You may need to reset the Network settings on your Apple device. Here’s how you can do that:
- Go to Settings, General, and click reset
- Click “Network Settings” from the menu to reset them; you may need to re-enter your WiFi credentials after this step.
- Disconnect and forget your AirPods, and try pairing again after a few seconds.
What Does the Orange Light Flash Mean?
It doesn’t just end at the flashing green status light. Instead, Apple uses advanced software and mechanisms accessible to consumers and easily understood.
The flashing lights on this Apple device communicate to users what’s happening and are easy to understand.
We covered that the flashing green light means that the AirPods are unrecognizable and how you can fix it. Now, we will talk about the orange flashing light. Apple also classifies this orange light as amber.
When your device flashes orange light, it could mean a few things:
- Your AirPods inside are currently charging in the case
- The AirPods charging case does not have enough battery percentage to charge your AirPods
- The charging case and the AirPods are both charging
- Your AirPods are facing a pairing glitch
In short, the notorious orange flashing light is a little tough to figure out. However, it’s possible to solve. Read on to see how you can fix this.
Fixing The Flashing Orange Light
If resetting your AirPods has not worked, you can try the following to fix this issue.
Restart Audio Source
AirPods can be connected to almost any Bluetooth device because of their compatibility. However, technology is prone to glitches.
If you have tried resetting your AirPods and they’re still not working, you should reset the device you are trying to pair them with.
Recharge the AirPods and Charging Case
Usually, the orange light shows that there may be less battery, so if you see a flashing orange light, plug in your AirPods and charging case.
Then, to check the charging or battery status, bring them close to your Apple device until a window pops up with the details.
Try Apple Support
Apple’s warranty allows users to connect with them over the phone or visit a genius bar. If you need help figuring out what the orange light means, go onto Apple’s website, enter your location, and find the nearest service center.
Update AirPods Firmware
Updating the AirPods firmware is a way to ensure your device is running bug-free. Bugs can cause many glitches in hardware.
If the flashing orange light is giving you trouble, connect your AirPods to your iPhone and follow the steps below to get an idea of the firmware:
- Go to Settings and then to Bluetooth
- Go to AirPods and click the round blue “i”
- In the tab that opens, you will see information about the Firmware version
Understanding the Lights On Your AirPods and Charging Case
Now that we have established that your AirPods communicate with you via colored lights, here’s a list to remember the next time you see a colored flash. This key should help you understand your Apple device much better:
1. No Light
This means your device is out of battery or is not in use.
2. Flashing White Light
This means your AirPods are currently pairing.
3. Orange Light – While AirPods Are In
This means your AirPods are charging inside their case.
4. Orange Light – Without AirPods In
The charging case does not have sufficient battery life to charge your AirPods and needs to be plugged into the wire.
5. Orange Light – While Connected to Cable
The AirPods and charging case are currently charging.
6. Orange Light – Flashing
This means there is a pairing malfunction or error
7. Green Light – While AirPods are In
There is a sufficient battery.
8. Green Light – Without AirPods In
The charging case has enough battery.
9. Green Light – While Connected to Cable
The charging case and AirPods are fully charged.
10. Green Light – Flashing
Both or one of the AirPods is undetectable.
Now that you know what your AirPods are trying to communicate, here’s what you can do when all means have failed.
Hard Reset Your Airpods
A hard reset is done when all else fails. So, if your AirPods show performance, output, and connectivity issues, the best thing is to do a hard reset. Luckily, this is a relatively easy task.
You must know one thing about Apple products. First, they are simple to use. The exact sequence of keys and buttons is held for different time intervals and with different combinations to achieve the desired result.
How convenient is that?
Here is how you can do a hard reset or a factory reset and ensure it runs smoothly:
- Put your AirPods carefully in their charging case and close the lid for 30 seconds. After that, re-open the lid but keep the AirPods inside
- Next, go to “Settings” on your iPhone and open the Bluetooth tab. From there, open the list of Devices.
- From the list of Devices, find your AirPods and click the blue circle “i.” Then, from your AirPods list of devices, click “Forget Device.” Next, do the same from your phone’s list
- Press and hold the button on the back of your AirPods charging case and wait for the blinking amber light. Release the button once the amber light flashes.
In short, you have done a solid reset. As a result, your AirPods will be disconnected from all devices it has been paired with.
Pair it again with those devices to continue using your AirPods as you were. After this factory reset, your AirPods should work smoothly, give clear and coherent output, and perform better.
If you are unsure about a hard reset, visit the nearest Apple store and ask a Genius bar expert to guide you.
How To Take Care of Your AirPods
AirPods are pretty expensive. AirPods currently retail from $199.99 up to $449.99, the most expensive being the AirPods Max.
Besides their price point, they are a good investment for those who are always on the move, have call-related work, live music, and are athletic. To make your AirPods last longer, try the following tips.
Don’t Overcharge the Device
The AirPods generally have an average battery life of 4.5 hours. However, when plugged in, the AirPods and charging case take over an hour to reach a charge status of 100%.
Overcharging your device can weaken the battery and may result in overheating, which is harmful to your AirPods and charging case.
Clean Your AirPods and Charging Case
Clean your AirPods every other week. Sound quality can be significantly affected when dust, debris, and ear wax get stuck.
Over time, users may blame bad audio quality due to hardware trouble. But, in reality, they only need isopropyl alcohol, a toothpick, a cotton bud, and a soft, lint-free cloth to clean the AirPods gently.
Disconnect AirPods When Not In Use
Apple is unpopular for its battery health; many devices begin to lose battery health within a year and a half of using their device.
To make your AirPods last longer, disconnect them and keep them off when you are not using them. In the long term, you’ll be glad you kept your device offline when not in use.
Take Care of Your AirPods
Carrying your AirPods properly also ensures proper hardware and software maintenance.
Invest in a good, shock-proof cover for the wireless charging case, don’t shove the AirPods into tight pockets or bucket bags, and be careful not to get any water on either of these devices.
Avoid Getting This on Your AirPods
Take care of your AirPods and ensure minimal or no contact with sweat, water, or direct perfume sprays. Also, ensure your ears are dry and clean before wearing your AirPods.
It’s also suggested you gently wipe the AirPods before placing them back in their charging case.
Conclusion
So there you have it, how to solve the mystery of your AirPods blinking green and other colors. One of the best qualities of Apple products is that they are user-friendly; this means a non-expert can tackle technical issues at home with the proper guidance.
In short, the LED status light is a crucial component of your AirPods set; it tells you what’s right and wrong, so pay attention.