
Isn’t it annoying when you’re on your phone, and the person on the other end keeps asking you to repeat yourself because your voice is muffled or breaking?
It breaks the flow of the conversation and becomes super frustrating. Unfortunately, AirPods users must relate to this because this is a recurring issue.
When AirPods came into being, a lot of people had a moment of hesitation to use these. But with time, they grew in popularity due to their shared agenda of making lives easy for iPhone users.
Now, AirPods are seen as a symbol of wealth and status. However, despite all of that, there are not free of error.
Suppose you own AirPods Pro, AirPods Max, or any other AirPods. In that case, you may have felt vexed in wanting to shake up your pods because of the audio issue, even though there is no doubt that technological advances have revolutionized how we communicate with people.
But, at the same time, we cannot deny that technical bugs often leave us feeling impatient when we’re on call, hearing music, or trying to send a voice note.
And same is the story when the AirPods sound muffled, and the microphone is not working correctly, especially for those who love to use the AirPods for their combination of high-quality audio and affordability.
But the good news is that you can solve the problem quickly on your end and fix the sound quality.
Table of Contents
How Do AirPods Function?
Before we go further ahead to understand why the sound is sometimes distorted on AirPods, let us first understand how AirPods work.
The best thing about this device is that it’s wireless, so you need Bluetooth to connect to an iPad, iPhone, Mac, or other devices. Once the connection is active, ensure the volume is not minimized to mute.
Now, AirPods come in a pair. Each AirPods is designed in a way that it belongs to either air. So, the AirPod meant for the left ear should specifically be worn in the left ear. AirPods are marked with an L and R to indicate which piece belongs to which ear.
You are supposed to wear them so that the stem points vertically in a downward direction. The notch should fit perfectly in your air.
When it comes to AirPods, there are no complicated power controls to make your life hard. Instead, accelerometers and optical sensors gear into operation when you put the AirPod in your ears.
These help you control and function the AirPods. Moreover, these functions stop working after you remove AirPods to save energy.
Apart from the essential functions, Apple AirPods may vary slightly in operation depending on what model you currently own.
This is obviously because Apple is constantly working towards making its devices more and more efficient. So, let’s take a look at the difference between different AirPods models and their unique functions:
Original AirPods:
In the initial models of the Apple AirPods, you had to tap one of the two earbuds twice to wake up Siri. Once Siri is active, you can control audio through her by saying out loud tasks like “lower volume,” “increase volume,” “pause,” “play,” “replay to the previous song,” or “skip a song.”
All the AirPod Models:
As AirPods are designed to simplify your life, you can pick up or decline phone calls just by tapping either of the earbuds double times.
AirPods 2:
If you own AirPods 2, you can skip tracks on your playlist by double-tapping either earbud.
You can also wake up Siri but must ensure your “Hey Siri” function is activated. If it is, all you need to do is say it aloud.
Once Siri is active, you can give instructions to control audio through voice commands.
Why Is It That My AirPods Sound Muffled?
AirPods’ sound quality can be dropped due to a variety of reasons. However, most of the time, the primary reason for the muffled sound is dust or lint gathering in the AirPod.
The good news is that if this is the problem, it can easily be solved if your clean your AirPods.
However, the muffled sound could also be in your Apple AirPods because of other significant issues.
For example, your stable Bluetooth connection may not be able to support high-quality input and output streams simultaneously.
So, check if your AirPods connect to your Mac properly.
Solutions to Muffled AirPods Sound on iPhone
AirPods are a blessing. But a little trouble can make life miserable. So, if your AirPods are currently malfunctioning and giving muffled sounds, trust us – you’re not alone in facing this problem. There could be several reasons why your AirPods sound is muffled.
If you’re facing this problem while using your AirPods on your iPhone, you can try some of the solutions mentioned before. However, if none of the solutions end up helping you, then perhaps it is time to visit the nearest Apple store to get the problem fixed.
Have a Strong Bluetooth Connection
AirPods are preferred because they are wireless, so their functionality is heightened and provides ease to the users. However, Bluetooth is an essential feature for all wireless gadgets as it ensures an actual connection.
Moreover, it is the single most crucial thing for third-party applications, which is why, for AirPods to work, Bluetooth connection needs to be solid and stable. If it is not, the sound will be compromised for sure.
AirPods muffle sound issues usually occur when the Bluetooth connection is not stable. However, short-distance transmission works perfectly if you ensure no interference.
If your Bluetooth connection is strong, the sound quality will be fabulous. If your Bluetooth connection weakens, your AirPods sound will be less transparent and muffled.
So, make sure your Bluetooth connection is not the problem before trying the other solutions mentioned.
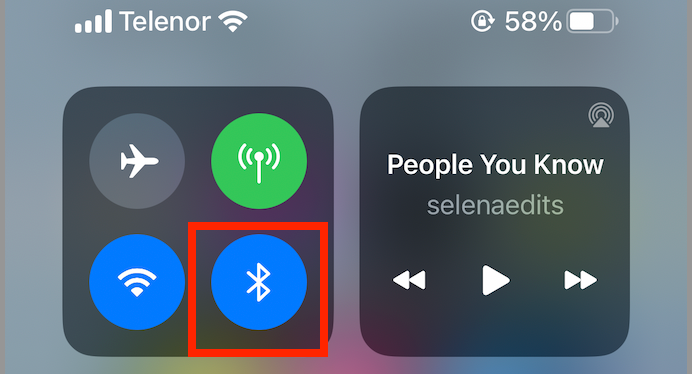
Disable all The Bluetooth Devices Temporarily
Sometimes the main reason behind AirPods’ muffled sound is the weak Bluetooth connection. This weak connection could be indicative of Bluetooth interference. To avoid this issue, disable all Bluetooth devices near you.
Because in today’s world, every gadget we use has a Bluetooth option, and we use it to carry out functions.
But, if your AirPods sound is being compromised, the best thing to do is temporarily disable all the nearby devices to ensure that nothing interferes with the connection between your AirPods and your device.
Cleanse your AirPods
AirPods are tiny. They need to occupy more space. Hence, when not using them, we often jam them in our pockets or cram them in our bags.
Now, that is all well and fine. Everyone does it. But the only problem is it keeps gathering dust particles this way. So even if you put your AirPods in their Airpod case, they still gather dust over time.
Therefore, to avoid this, you must ensure that cleaning your Airpod is a regular part of your routine.
Now, before we go ahead and give you a few tips to clean your AirPods, let’s put out there that you need to use a dry and clean cloth to clean your AirPods. Please do not attempt to clean your AirPods with a wet cloth or something metallic because it may damage your device irreversibly. You don’t want to damage your AirPods; you want to solve the sound issue.
So, use the following things mentioned ahead if you’re sitting down to clean your AirPods:
- A dry piece of cloth with Microfiber
- Quality Tips
- Spray cleanser or rubber alcohol
- Rolling pin or toothpick
- Compressed air blower
Once you have these materials at your disposal, it is time to start the cleaning procedure. You can do it according to your instinct or follow the helpful steps below to clean your AirPods.
- First, take a microfiber cloth and rub the outside of your AirPods. Make sure you cover all the sides and leave no part undone. This step ensures that your device gets rid of the dust particles accumulating.
- Now, use your quality tips to clean the speakers of your AirPods. You can dip it in a safe screen cleaner before performing this step.
- Now, take your toothpick and dust off the soft debris that is building up in those parts of the Airpods that you can’t reach with a Q-tip.
- Next, retake your dry cloth to remove all the residual debris.
- Then, pick your compressed blower and blow off the dust specks that are building up behind the grill.
- Ensure you clean the AirPods case so your hard work is well-spent
Now, you need to follow these steps on each of the AirPods. First, wait for them to dry, switch them on and connect them to a device. Next, play a sound on them and examine if the sound quality has improved.
Reboot The AirPods
Let’s be honest; if you are an iOS fan, you probably know that a simple reset does solve most minor problems. For example, many Apple AirPods users have reported that restarting their AirPods solved the muffled sound problem. So, you can constantly whirl try and restart your AirPods and then examine if the problems persist.
Your AirPods may be exhibiting signs of issues regarding sound quality, battery life, connectivity with other devices, etc. However, resetting your device may get rid of all these problems. So, to do it, you should follow the steps ahead:
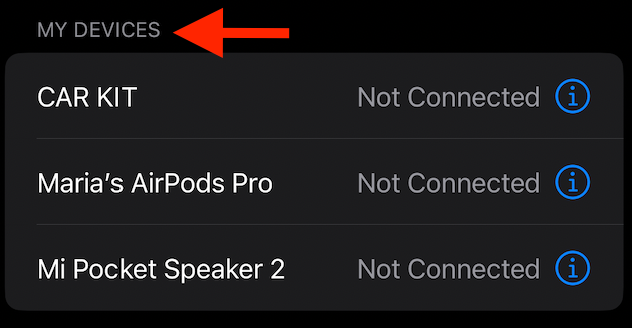
- Remove the pairing of your iPhone from your AirPods.
- Now, find the Setup toggle on the AirPods exterior, and press it for at least 15 seconds without lifting your finger.
- You will observe the light changing. It should be white for a while; then, it will flash in a shade of amber a couple of times before turning white again. Please wait for it to happen.
- When the light turns white, your AirPods have completed their reset procedure.
Once the reset is done, switch on your AirPods. Now, connect them to your device – it could be your iPhone, MAC, iPad, etc.). Now, play audio to figure out if the sound coming from your AirPods is still muffled.
Ensure Your iOS device is Updated
Even though resetting the AirPods does the trick, it indicates that your IOS device may need an update if it does not. So to see if your device still needs the latest version, update it as soon as possible. Otherwise, your microphones won’t be the only feature that won’t work.
Apple is always working towards bettering its existing features. This is why every year, we get an updated OS. Hence, it is pertinent to update your iOS device and ensure that your AirPods are also updated before connecting them to your iOS device.
So, if you want to update your iOS to its newest version, then you should follow the steps ahead:
- Shut down all the open apps
- Launch Settings
- Tap on General
- Find Software Update and click on it
- Select the available update option, tap on Download and InstallYou’lll need your passcode, then select Install Now.
If you don’t have any available update options for your iOS, then you must visit an Apple store to solve your problem through troubleshooting tips. However, in some cases, it is also possible that your AirPods sound comes out as muffled after the update. So, in such a time, you should ask an expert if you should revert the upgrade to improve the sound quality.
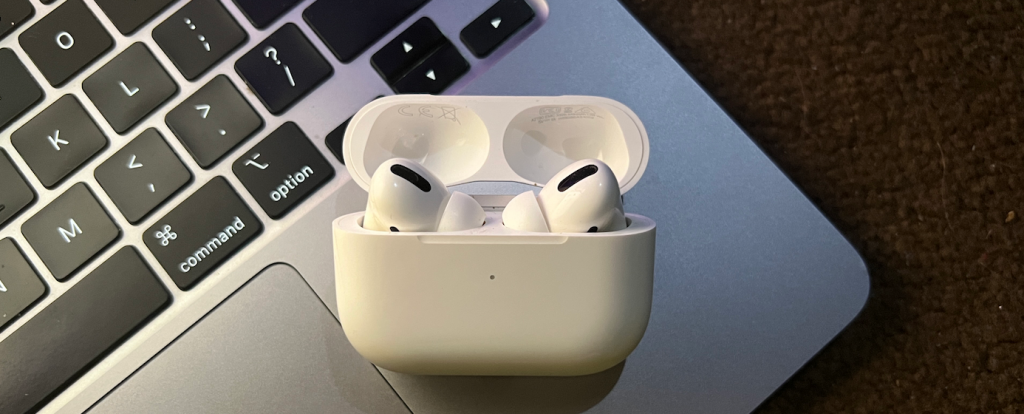
Solutions to Muffled AirPods Sound on MAC
One of the key reasons why the sound coming from Airpods is muffled is when the codecs of your AirPods and your MAC become intertwined. Unfortunately, Mac’s sound ecosystem usually leads to Airpod’s codecs getting affixed at 16KHz. So, if you’re having a sound issue, you must play around with your Mac’s default input system settings.
One Solution: Changing the AirPods Microphone Input – Multiple Approaches
Switching to your MAC’s in-built microphone input is the best way to fix your muffled microphone problem. There are several approaches to solving this problem. We have listed down the most effective and easy approaches below:
Fixing through Sound Settings
Every OS user knows that Sound Setting is integral to every OS system. So, if you want to alter the AirPods microphone input, you can do it via Sound Settings. All you have to do is follow the steps ahead:
- Launch System Settings on Mac
- Find the System Preferences app, and tap on it
- Locate Sound and select it
- Now, look for the Input tab in the Sound window and tap on it
- Select your Mac’s built-in microphone
Please wait a few seconds for your Mac to switch codes, and don’t rush it. Once it has been changed, try to play any audio to see if the sound quality has improved. Most probably, your muffled sound problem will disappear.
Fixing Via Bluetooth
It is not as common as you’d think for Mac users to know that the Bluetooth option can be found in the menu bar. This will help you access it more efficiently and quickly to alter your sound preferences app. So, if you want to alter your audio codecs via Bluetooth, you can follow the steps ahead:
- Find the Bluetooth option in the Menu bar and select it
- In the drop-down options, switch the device from Airpods to Mac
However, if you cannot locate Bluetooth options in your Menu Bar, go to System Settings and tap the System Preferences App. In there, you can find the Bluetooth option. From there, the steps are the same as the above.
Employing the AirPods Sound Quality Fixer
The Sound Quality Fixer is a built-in application found on Apple Devices. This app is helpful when the audio settings are everywhere because it returns them to their default setting. Usually, if the settings are set back to their innate status, the sound problems are fixed. So, if you want to use this application to fix the Airpods muffled sound, follow the steps ahead:
- Select the Menu Bar
- Locate and select the AirPods Sound Quality Fixer option
- Now search for the Microphone connected to your MAC as a forced input and select it
- Now hold until your Mac shifts codes
- Once you have performed these actions, the sound quality fixer will get to work and automatically reset all the microphone input settings. This setting change will also ensure that this app fixes future audio issues.
Final Word
With new technology, there is no doubt that our lives have become more accessible and quicker. AirPods rose in popularity because of their affordability. It made its user’s life easy. However, with ease, sometimes a difficulty may arise as well. In times like this, the best thing to do is find a rational way out.
If you have tried all the options mentioned above, and your AirPods still have sound issues, don’t give up; remember that it’s time to try a different approach and visit the nearest Apple Store to get help.
Apple is working tirelessly to ensure that its products are making lives easy for its users, but despite that, a problem can occur here or there. So, the best thing to do in such a situation is not to fret and think of the best logical solution for your problem. Your investment in your Airpods is an intelligent decision, and hopefully, Apple Support will cater to you by helping you with your microphone issue.
FAQs
Should I get AirPods Pro for Phone Calls?
The Airpod Pro’s microphone may be your best bet if you’re a frequent caller. The microphone quality is superb, and the noise-canceling function is perfect for voice calls. So, if you want to avoid poor-quality sound, choose Apple Airpods Pro; they are the best in the market with their touch sensors, transparency mode, and great bass.
How to Find out If My AirPods Mic Is Of Good Quality?
In the current market, AirPods have the best microphone unit that yields high-quality sound. As a result, most experts have compared AirPods with its competitors, and the result is always the same – AirPods outperforms. Moreover, Apple is constantly working towards improving its microphones.
If My AirPods Mic is Not Working, Can We Fix It?
If your AirPods Mic is not working, you can fix it. First, you should try rebooting your Apple device to see if it works fine. If it’s not, there could be a bigger underlying problem, but restarting the device you’re trying to connect your AirPods with usually works.
Is There a Way to Make my AirPods Mic Louder?
It depends on the kind of AirPods you own. If it is the first generation, then you must double-tap either of the two earbuds. This will activate Siri, and you can ask Siri to elevate the volume. If you have AirPod, you must set up the Hey Siri option on your phone. Then, you can say,” Hey, Siri,” and ask Siri to increase the volume.
Can I Test My AirPods Pro to Check If the Sound is Muffled?
The simple answer is: Yes! You can check your Airpod to see if the sound is still muffled before taking that critical call you’ve been waiting on:
- Go to Homescreen. Locate Voice Memos
- Now select Record
- Talk into the microphone
- Save the Audio
- Now, play and listen to the recording. If you can hear yourself, your Airpod sound is not muffled anymore.
Where Can I Find the Mic of AirPods Pro?
If you can’t locate your Airpod Pro’s mic, look for the stem area near your mouth. There you should be able to find your microphone’s ports.