
Does your MacBook act like Rapunzel? Sleeping away the minute you leave it unattended? If yes, it’s time to do something about it.
Entering your password repeatedly can be frustrating and kills precious time. Therefore, save yourself from this trouble and learn to change your screen’s lock time on Mac.
Without further ado, let’s learn to stop your Mac from going to sleep by changing your screen’s timeout on your Mac.
Table of Contents
Why MacBook Switches to Lock Screen Automatically
Several reasons may be responsible for your MacBook to sleep and switch to the lock screen automatically. For instance, a magnet might be placed near your device, causing interference with the operating system.
Another reason your MacBook switches to a lock screen may be that you have enabled hot corners that activate whenever your laptop is inactive. We will learn about them later in the article.
Furthermore, your Energy Saver feature might be misconfigured, causing changes in your lock screen timeout. We will learn more about configuring these correctly in the following read.
How to change Screen Timeout on a Mac
It’s possible to change your screen timeout time based on your preferences. Following are some of the ways:
Change Screen Timeout through the Energy Saver Option
The first method for changing timeout is by following the steps below:
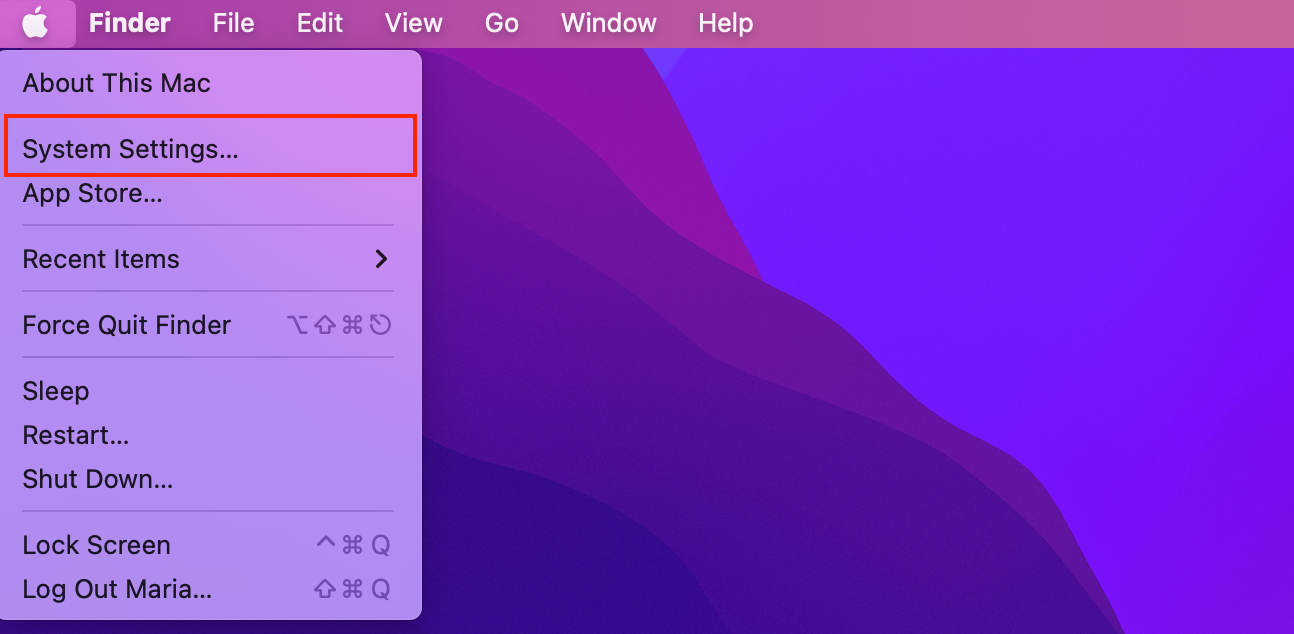
- Click on the Apple menu
- Select System Preferences

- Next, Select the Energy Saver option
- Look for a lock symbol on the bottom left corner of your screen
- Enter log in details (user name and password)
- Use the scroll bar to adjust the screen timeout
Finally, you can change your Mac’s timeout according to your preferences.
Change Timeout through the Battery Option
If you have a MacOS, here is how you can change the timeout:
- On the top left corner, click on the Apple logo
- Next, select System Preferences
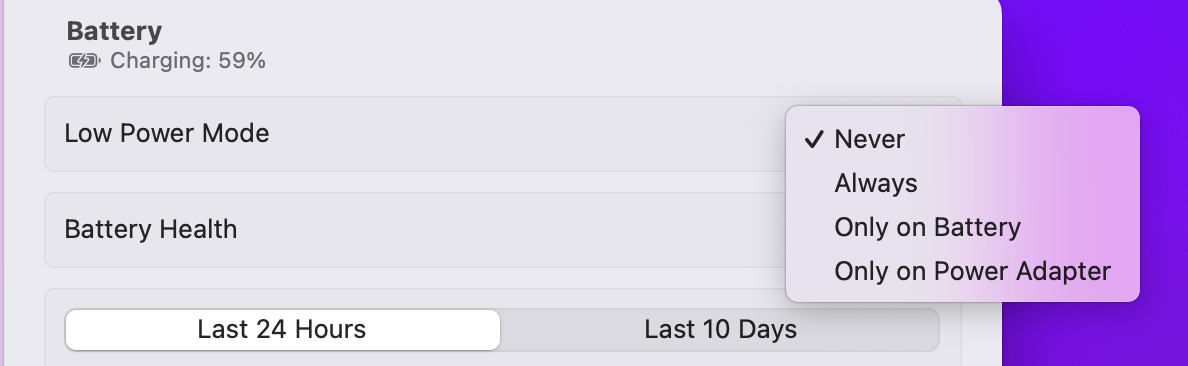
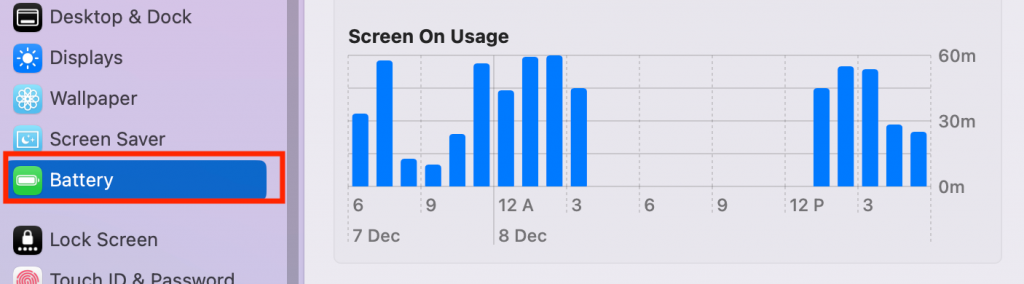
- Select Battery
- Afterward, navigate to Battery in the left panel
- Drag the slider that reads, “Turn display off after.”
- Adjust according to your choice
Consequently, you can set up a timeout based on your feasibility. Furthermore, to select the timeout for your Mac while it’s plugged in, follow the steps below:
- Open System Preferences
- Select Battery
- Choose Power Adapter
- Glide the slider to your preferable time
At last, you will set up a timeout for your Mac while it’s plugged in.
Use the System Preferences (Security & Privacy) option.
You can also adjust your timeout settings through the Mac settings option. To do this, follow the steps below:
- Again, Click System Preferences
- Go to Security & Privacy
- Next, click on the Pad Lock icon
- Enter Admin password
- Then, scroll the drop-down menu under “Require Password Immediately”
- Choose a suitable time
Finally, you can choose a preferable timeout for your Mac. But, again, remember to choose wisely, as it impacts your battery levels.
Adjust Screen Saver Timeout on Mac
You can also choose how long your Mac can be inactive before the screensaver begins. Here’s what you need to do:
- Head over to the Apple menu
- Select System Preferences
- Next, select Desktop & Screen Saver
- Then, navigate to the Screen Saver tab
- Scroll through the drop-down menu and choose any pre-defined time interval
- Finally, check the box that reads “Show Screen Saver After”
Change screen timeout through Hot Corners
You can also change your screen timeout by setting up a hot corner. A desirable corner allows setting up any corner of your screen as a shortcut to start actions once the cursor moves on it. These can be set up to activate the screensaver when you leave:
- Head over to the Apple menu
- Click System Preferences
- Next, head over to Desktop & Screensaver
- Click Screensaver, and then choose Hot Corner
- Click on the screen corner you wish to use
- Finally, click OK
Additionally, you may turn it off to keep your MacBook from going to sleep. Go to Desktop & Screensaver, and under Hot Corner, select “-” from the list that appears. This fix will disable “Put Display to Sleep.”
Turn off the Timeout Feature through the Apple Menu
Alternatively, you may also turn off the timeout feature on your Mac. Here is what you need to do:
- Go to the Apple menu
- Click System Preferences
- Next, choose Energy Saver
- On the bottom left corner of the screen, click on the padlock icon
- Then, enter login details (username and password)
- Glide the slider that reads “Turn display off after to” and drag it to Never
- Also, tick the check box “Prevent the computer from sleeping automatically when the display is off.”
- Moreover, uncheck the box that says, “Put hard disks to sleep when possible.”
Finally, your computer screen cannot go to sleep mode.
Other Lock Screen Tricks for Mac
Enable Picture on Lock Screen
You may also want to protect your data and sensitive information from unwanted eyes, and locking your computer is the best option. While at it, you may customize your Mac’s lock screen by adding any new image you want. Here is how you can do it:
- Click on the Apple menu
- Click on About This Mac
- Select Displays to check the screen resolution
- Select your desired image through the Preview option
- Next, head over to Tools and then Adjust Size
- Change the pixels to match your screen resolution
- Select OK and save the image as a PNG file
- Name the file com.apple.desktop.admin.
- Next, open Finder > Go > Go To Folder
- In the pop-up window, type /Library/Caches and select Go
- Drag your picture to the Caches folder and select Replace
Finally, you have prepared a personalized picture for your Mac’s lock screen. If Replace option is unavailable, save the selected image as lockscreen.png. Next, click Desktop Pictures under the Caches folder and replace the image when asked.
Enable Mac Lock Screen Wallpaper
Additionally, you can change your login wallpaper through the following:
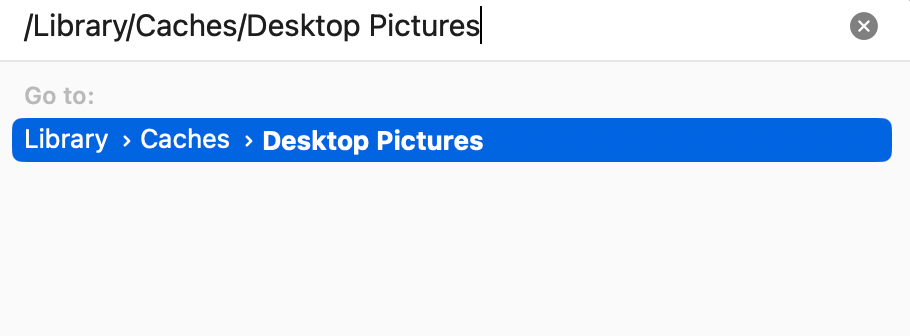
- Navigate to Finder
- In the menu bar, type and go /Library/Caches/Desktop Pictures
- In Desktop Pictures, select your folder
- Replace lockscreen.png with your desired wallpaper
- Enter username and password
- Restart your Mac
Enable Lock Screen Message on Mac
Your Mac lock screen is already sporting a personalized picture of your choice. Next, you may want to add a lock screen message too. Here is how you can do this:
- Once again, click on the Apple icon
- Tap System Preferences
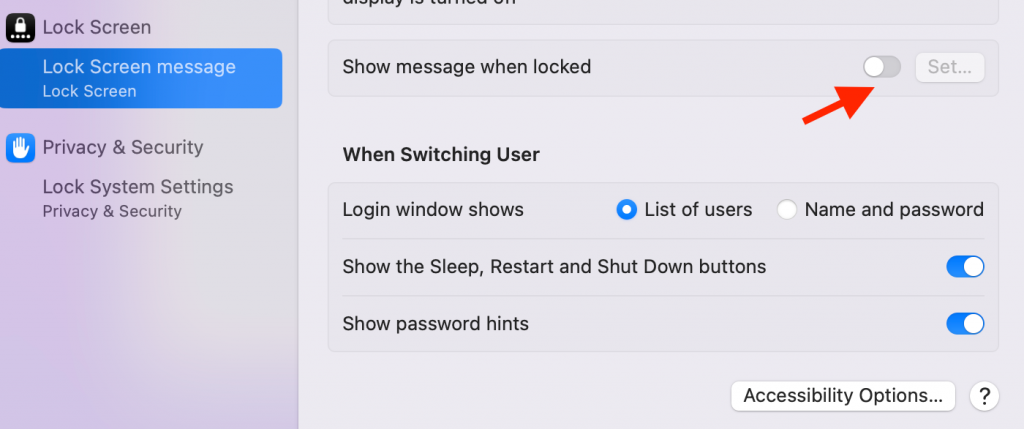
- Click Security & Privacy
- Select the Padlock icon on the General tab
- Type username and password
- Tick the option that says, “Show a message when the screen is locked”
- Select Set Lock Message
- Type the message you want to keep and click Lock Screen
If you follow the above method correctly, you will now view a personalized lock message on your lock screen.
Turn off the Lock Screen on your Mac
In ideal scenarios, no one may mess with your computer. Consequently, you may want to turn off your lock screen. Here is how you can do that:
- Select Apple icon
- Choose System Preferences
- Go to Security & Privacy
- Check the Require Password checkbox
- Upon prompt, select the Turn Off Screen Lock option
Conclusion
Ah, finally. You must feel relaxed now that you have configured your MacBook’s login timeout settings for uninterrupted work. Don’t forget to pass tricks to your friends and family on the page.
Frequently Asked Questions
How to lock the screen on Mac?
On Apple’s menu, select Lock Screen. Alternatively, press CTRL + CMD + Q.
How do I keep my Mac from sleep mode?
Under System Preferences, Go to Energy Saver and drag the slider to Never.