

Your productivity can reduce if your files and folders are not properly organized. If you’ve been using a Mac desktop or a MacBook for years now, you’ve probably accumulated a lot of documents and files. Without order, you’ll just be running around in circles looking for a file when you need it the most.
Thankfully enough, macOS is powered by some pretty nifty file organization features. There are many ways you can organize files. Pictures, movies, and music already have their dedicated apps and folders, so this article will focus on documents, e.g., work documents, tax returns, pdfs, etc.
Table of Contents
Ways to Organize Files on Mac
Your files may exist in several places on your Mac, so let’s tackle them one by one.
Mac Desktop
Many people place files on the desktop or directly download them to the desktop. That’s fine when you have a few files to deal with, but they can get a bit too much over time. If you can hardly see your desktop background, it’s a good indication that it’s time to do some organizing.
Your desktop needs to be pristine and clean with no clutter. That means any files that you’re no longer using or don’t need often need can go out of the desktop. It’s best only to have recent files or those you use very frequently present on the desktop.
Create Folders
To reduce clutter on the Mac desktop, the most straightforward solution is to create folders. Now, the best way to create folders and organize your files is to group similar files. For example, this could be the files related to an ongoing project or files of the same media type.
For instance, you could create a folder for all the PDFs. That way, when you need a PDF file, you can look in that folder.
How to create a folder on the Mac desktop? It’s pretty simple:
- Select all the files you want to group
- Control-click on any selected file
- Choose New Folder with Selection
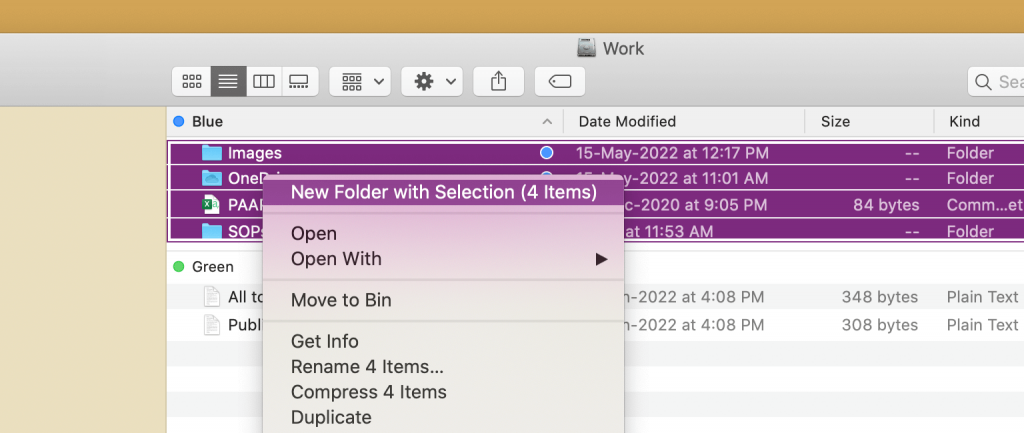
Make sure you name the folder wisely, so you know what the contents of the folder are. For example, you could use project name, department name, or month. Keep in mind; that you won’t be able to group any locked files.
Stacks
The stacks feature for the desktop allows you to organize files in tidy groups automatically. It makes it easier to access those files when they are stacked on one another in one place. You can create stacks by file type, tags, or date.
The best thing about stacks is that any new file would automatically be stacked on the appropriate group once you’ve set it up. Also, stacks are available on the Dock.
Here’s are three ways you can create stacks:
- Click on the desktop and choose View, then Stacks
- Control-click on the desktop and choose Use Stacks
- Press Control-Command-0 simultaneously
To select how the stacks are grouped, go to View, Group Stacks By, and choose the options you want (e.g., date last opened).
Sorting the Desktop
Another helpful way to organize your Mac desktop is to sort how the files are presented on the desktop. macOS provides you with several options for managing files this way. These include name, size, date, type, tags, etc.
Click View, then Sort By, and click on the option you want.
It just makes it easier to locate a file when they are stored in an orderly fashion on your desktop. For instance, if you arrange them by type, all your spreadsheets will be in one row, one after another. So you don’t have to look around much.
Documents Folder
The Documents folder in Mac is the most critical place where almost all of your files will be stored in the first place. Many applications, by default, save their documents into this mega folder. Apps create their folders within Documents to save files in that particular folder.
With so many files being downloaded directly to the Documents folder, it can get messy pretty fast. So the best way to go about file management and organization is to target Documents.
Folders are your best friend when it comes to organizing files on your Mac. So it would help if you created folders using the same strategy we used for managing files on the desktop.
You can create folders for individual projects, file types, periods, semesters, courses, teams, etc. Of course, this would depend on your work and how you work.
For instance, it would be best for a student to create folders for the course and then group them under a semester folder.
What if you have tens of files that need to go in the same folder. In that case, it’s a good idea to use subfolders. You can use as many subfolders as you need.
You can create a folder by going into File at the top and selecting New Folder. Alternatively, you can simply Shift-Command-N. A new folder with the title ‘unnamed folder’, which you can change and press Return.
Finder
Finder is where you can find anything that’s there on your Mac. It’s the square one of organizing and looking for files on your Mac device. Many people use Finder to manage files and folders.
You can use the sidebar of the Finder to locate files wherever you’ve stored them. You can also manually search for them by typing in the search bar on the top right corner. However, there are a few tricks you can pull to make Finder even more organized.
Here’s how you can use Finder to organize files:
Tags
Tags can be a lifesaver when it comes to looking for files in Mac, especially in Finder. You can even use tags with Siri to locate all files with a specific tag.
Tags can help group similar files together, regardless of their actual location. These can also help link files of different types or from another period but are still linked.
Here’s how you can create tags for files and folders:
- Create Tag When Saving File: In the Save dialog/window, click on the Tags field and enter tags manually or select from the suggestions.
- Tag Open File: On the right of the document title, click on the downward arrow. Click on Tags and enter a new tag or choose from the suggestions.
- Tag File in Finder: In Finder, click or select the file or folder you want to tag. Click on the Tag button and enter a new tag.
You can tag any file or folder. Also, you can add multiple tags to them.
What if you want to change a tag or remove it? That’s pretty simple as well.
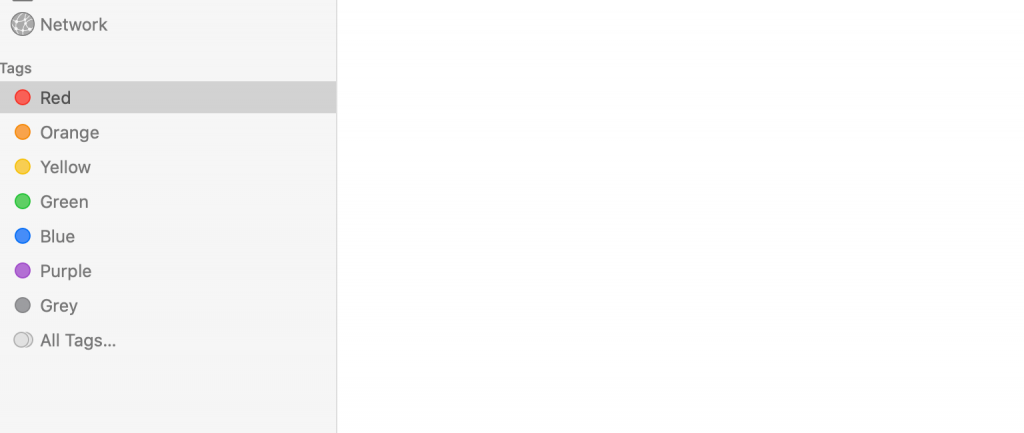
To edit a tag, go to Finder, you’ll see the tag in the sidebar. First, select the blue checkbox next to the tag. Next, click on the tag’s name and edit or enter a new name. Similarly, you can change the color of the tag by clicking the color and then choosing a new color.
To remove a tag from a file or folder, Control-click the file or folder, then select Tags. Next, select the tag and press Delete.
Smart Folders
Another reason why Finder is a great place to start organizing folders and files is that it lets you create Smart Folders. These folders use logic to group-specific similar files. As a result, you don’t need to manually move files to the folder, even in the future, when you download or create new files.
You can create Smart Folders for documents of the same kind or perhaps have the exact phrase, for example, a topic.
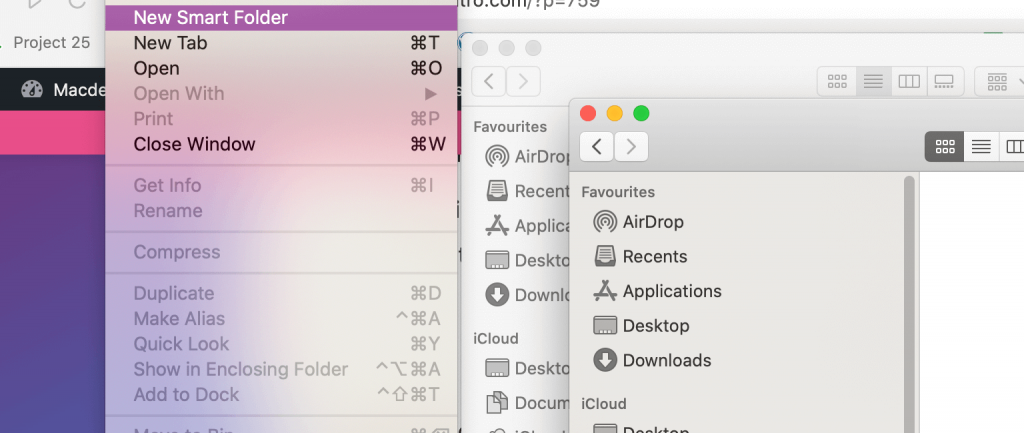
Here’s how you can create a Smart Folder:
- In the Finder window, click on File, then New Smart Folder.
- A new window will open with the Search field (this is where you’ll define the criteria for the folder)
- For example, you can organize by Kind and select PDF.
- Similarly, you can organize by name by selecting ‘name’ and entering a word or phrase in the text bar next to ‘contains.’
- You can add multiple search criteria by clicking on the ‘+’ sign at the end.
You’ll be surprised to see just how specific you can be to narrow down the search.
Some people use Smart Folders only for organizing files. Even though their files are all over the place on the desktop and Documents, they can locate any file in seconds using a Smart Folder with very detailed search criteria.
By the way, when you create a Smart Folder, you don’t create another location of those folders or files. The original location remains the same. It’s just their address is copied, and when you access it, you’re accessing the file from its original location. How awesome is that?
iCloud Drive
We can’t talk about organization without addressing the iCloud drive. By default, the files on your Mac desktop and Documents are backed up by the iCloud drive. So any organizational changes you make in these locations are reflected in iCloud as well.
However, you should ensure that your iCloud is set up to back up these two folders and any other app whose files you want to be backed up into the cloud. Here’s how you can sync desired folders:
- On Mac, launch System Preferences
- Click on Apple ID and click on iCloud on the left sidebar
- You will see a list of apps that are using iCloud
- See if Desktop and Documents folders are checked
If they are, then all the docs in these two folders are backed up by your iCloud drive.
You can also create folders within iCloud to organize your files and get rid of the clutter. Again, you’ll need to head to the iCloud from Finder. You can create a folder the same as you would with desktop or Documents (Control-click > New Folder).
You can manually move files to this particular folder. This can come in handy when you want to share specific files with other members of your family who have access to your iCloud. For instance, you could use a folder to place all the bills of the house or tax documents so your spouse or partner can access them too whenever they need them.
Third-Party Apps
If the organizational features provided by macOS don’t do it for you, there are many third-party applications designed to make your files and folders a bit more organized.
Hazel is one of the most popular apps for organizing documents on Mac. It follows the rules similar to the search criteria you set up for a Smart Folder to sort files on your Mac.
Evernote, which is essentially a notetaking app, can also come in handy. For instance, if you’re saving many documents just for referencing for research or anything, you can store them in the Evernote app, perhaps. Note that you can also backup files on Evernote on your iCloud drive.
Then you also have those decluttering apps that help find duplicate files. Gemini 2 is one such app that can automatically delete duplicate files. However, you should be careful with such an app, as you don’t want it to delete a file that you want to keep accidentally.
While these apps are helpful, you don’t necessarily need them, as MacOS is enough on its own to provide some impeccable file organization.
Wrap Up
Organizing files and folders on Mac is pretty easy, especially with features like Smart Folder and tags. Ensure that all your important documents are backed up in the iCloud drive, no matter where they are located. That would ensure that you can access them from anywhere, including from your other Apple devices.
By the way, you can also ‘favorite’ folders, which can come in handy for accessing frequently used folders. Similarly, you can also lock folders if you want to restrict access.