The drag-and-drop feature may be the most underestimated feature available on the Mac. The option allows you to use your pointer to click and drag files and folders to another place and let them go.
Your file or folder will be moved or copied depending on the circumstance. This feature is pretty handy and saves a lot of time. Therefore, it’s best to learn how to drag and drop on Mac from the pros.
Let’s uncover how to use this handy tool on your Mac.
Table of Contents
How to drag and drop on Mac
You can use the onboard trackpad or an external mouse to drag and drop on a Mac, such as a wireless or wired one. The drag-and-drop feature works for relocating files or folders and capturing images and text.
Drag and drop on a MacBook
You can use this feature with an external mouse or trackpad. Here is what you need to do:
- Please select the item you wish to drag and drop by clicking on it. This will highlight the item
- Drag the item by pressing and holding on to the object
- When you have reached your desired location, let go of the mouse and drop it in the new location

Drag-and-drop images and text
Similarly, you can also use the drag-and-drop feature to drop images and text onto the desktop. Text clippings are chunks of text that you can drop on the desktop and use in any document.
- Select any text and drop it on the desktop or Finder window. This action will create text clippings
- Press and hold on to the clippings and drop them in the document of your choice
- Similarly, select any image and drop it on the desktop to save images
- Drag and drop to the dock, Finder window, or other new folder or location
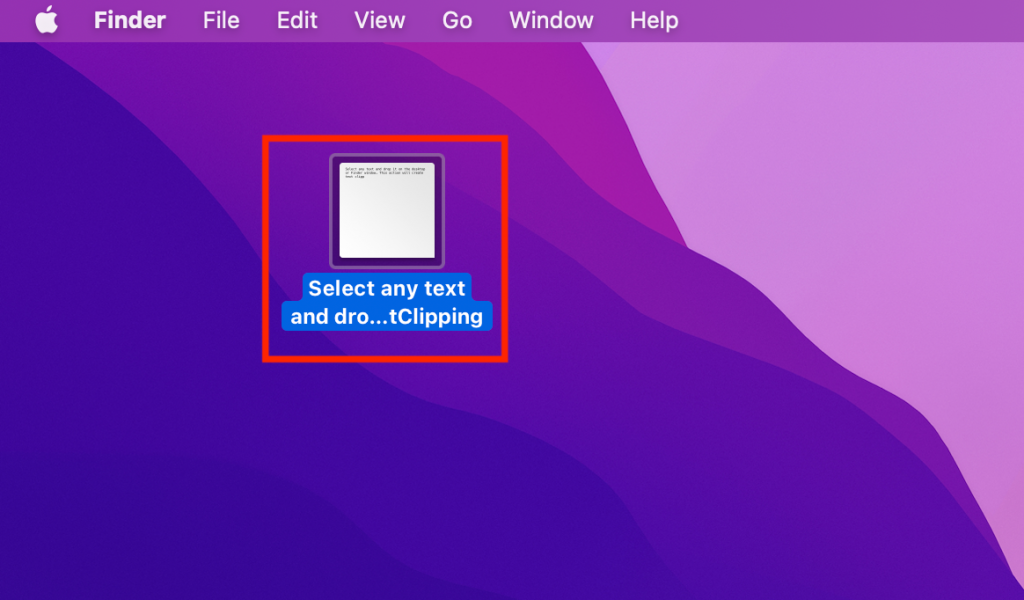
Alternatively, you can drop the clippings on any search engine except Safari.
Drag-and-drop items on the dock
The dock is a convenient feature on the Mac that features a small panel along the edge. You can use it to launch applications and switch between currently running ones.
To drag and drop items onto the doc, click on the applications and hold on to your pointer control or trackpad until you reach your preferred arrangement.
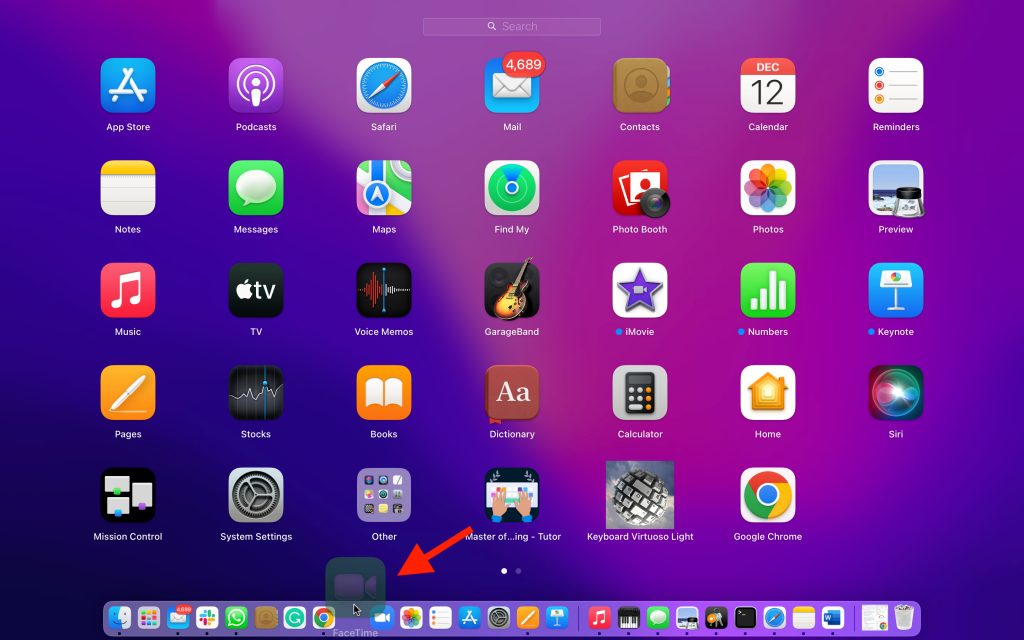
You can also move recently used applications by dragging and dropping them in the required position.
Drag-and-drop items to favorites
You can also use the drag-and-drop feature to add folders, such as the Desktop to Favorites available on the Finder app. The Favorites panel allows users to locate files, folders quickly, and even applications they use most frequently.
Here is how to add items to your Favorites:
- On the dock, click on Favorites
- Next, click on the application, file, or folder you wish to add
- Finally, drag it to Favorites
Once you drag the item to Favorites, a red line will appear to allow you to see the location of your item in the Favorites section.
Similarly, you may also want to add applications to Favorites. To do that, drag the application while holding the command key. In addition, you may also remove items from your favorites by dragging them away.
Drag and drop files with Touchpad
You can use the three-finger drag feature to drag and hold. Here is how to enable three-finger dragging on your Mac:
- Open System preferences
- Select Trackpad settings
- Click on Point and Click Tab
- Select three finger drag
After enabling this feature, here is how to use it:
- Press and hold text and files while dragging to select multiple files and text. Alternatively, you may also select a single item
- To select side-by-side files, hold shift; moreover, for nonsequential files, press the command key
- Press and hold your Touchpad to move the highlighted item
- Release
Alternatively, you may relocate or copy files to a new location, such as a different folder. To do this, select files while pressing the Option key and drag them to their new destination.
Drag and drop without a trackpad
You may also use left click and primary click with your Bluetooth or wired mouse to use drag and drop on your Mac. Here is what you need to do:
- Select an image or text
- Use your mouse to highlight text or image
- Select and click on a single item and move your mouse to highlight
- For multiple files, press Shift
- Next, click nearby files. To select multiple items that are not side by side, press the command key while clicking objects individually
- Finally, hold and then drag your files to their new destination
Drag and drop with Drag lock
Drag lock enables users to continue dragging without continuously holding on to the trackpad or mouse. Here is how to enable dragging with a drag lock:
- Head over to System Preferences
- Go to Accessibility> Pointer Control> Mouse & Trackpad
- Go to Trackpad Options
- Besides Enable Dragging, check the option With Drag Lock in the dropdown menu
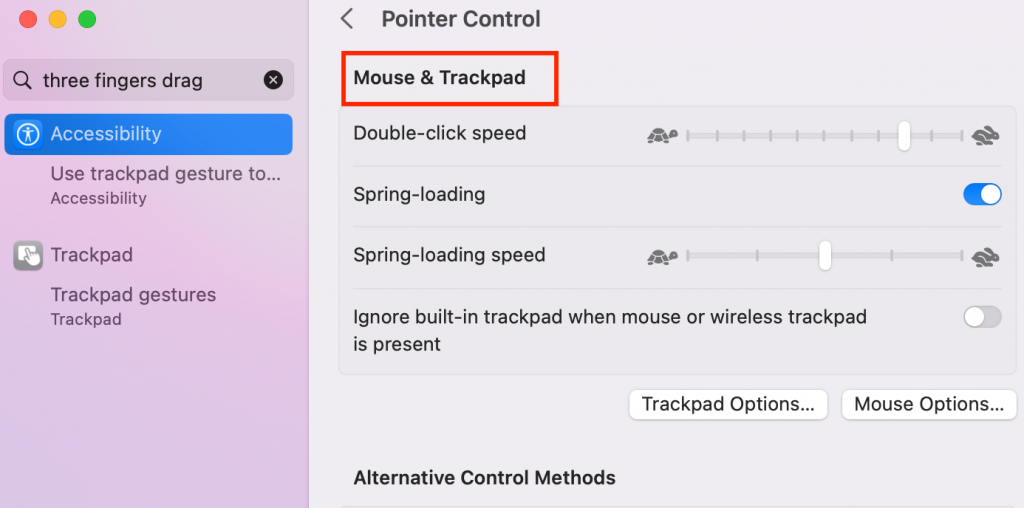
Finally, you have enabled the dragging feature on your Apple Mac computer. If you are having trouble dragging your highlighted selection, ensure that you drag the mouse without lifting your finger.
Using trackpad gestures
With your magic mouse or trackpad, you can use several gestures such as click, tap, swipe, and even pinch to perform several functions.
These trackpad gestures enable Mac users to open the Notification Center, zoom in on documents, browse music, and more. Here is how to allow it to:
- Go to the Apple menu
- Select System Settings
- Select Trackpad
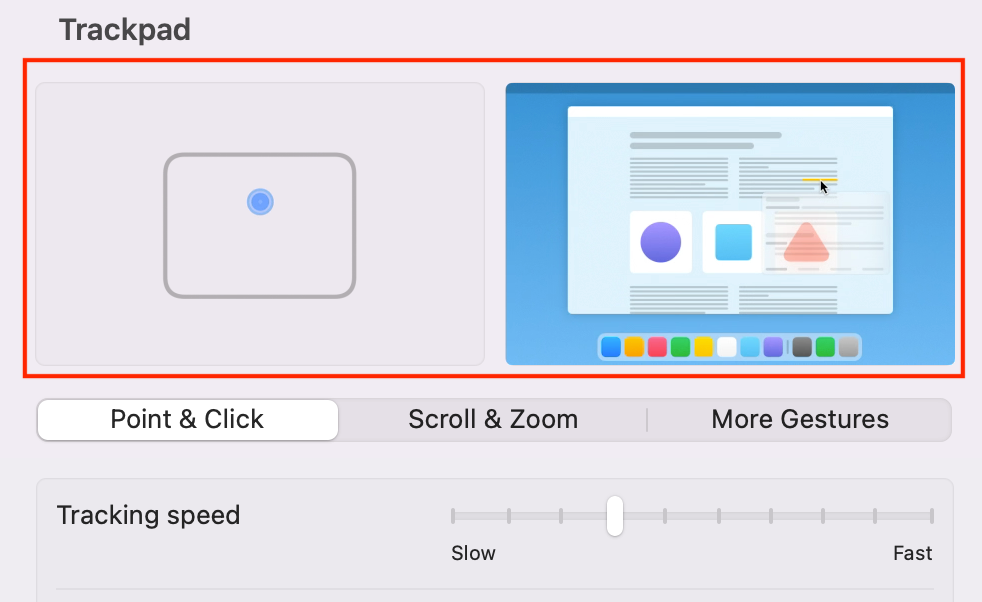
Here, you can watch video demonstrations on how to use trackpad gestures. Moreover, you can also turn them off and customize them under Trackpad Settings.
Drag and Drop through Universal Control
Did you know you can also use the dragging and dropping feature across Apple devices such as your iPhone and iPad? In addition, universal Control lets you sign in with a single ID across multiple devices.
Next, keep them close while moving the cursor on the trackpad to the other device’s screen. This action will allow you to drag and drop to different locations quickly. Here is how:
- On your Mac, go to the Apple menu
- Select Displays> Advanced button
- Check ” Allow pointer and keyboard to move between any nearby Mac or iPad”
- Select done
- On your iPad, go to Settings
- Go to General > Airplay & Handoff
- Check Cursor & Keyboard

Unfortunately, you cannot use this feature on the iPhone.
Conclusion
At last, you have learned about the many wonders of your Mac’s dragging and-dropping feature. Finally, you can get things done more efficiently and save precious time. Till next time!
Frequently Asked Questions
How do you right-click and drag on a Mac mouse?
Like a Windows computer, press and hold the control key while clicking on the item to move an item to another location.
How to drag and drop photos on Mac into Google photos?
Press the command key while selecting the individual images to transfer multiple files into Google photos. Next, select command + A and drop all the files into the photos app.

