
If your MacBook’s Wi-fi signals keep getting disrupted, it can cause a lot of anger and frustration because a stable Wi-Fi connection is a need of almost all individuals.
From connecting with people to working on human developmental projects, nearly all daily activities require a Wi-Fi connection. Therefore, you should take any lag or disruption in your Wi-Fi signals seriously. This article will teach you 15 easy hacks to fix a disconnecting Wi-Fi and improve your work-life balance.
How to troubleshoot Wi-Fi connection issues
Wi-Fi connection problems can be due to various reasons. But fixing them is also easy and quick. Below are some of the more accessible and guaranteed wifi fixing options available.
- Ethernet connection
If your Wi-Fi keeps disconnecting on your Mac, the easiest solution is to use an ethernet connection. It is slightly a better connection than Wi-Fi as devices and objects can’t disrupt ethernet signals.
So, if your device has an ethernet port and a spare ethernet cable, try using it to secure your network connection.
As ethernet cables provide physical contact, it rules our Wi-Fi signals issue. So, connect your router with your Mac using a line and check if it fixes the problem.
- Diagnostic test using a diagnostic tool
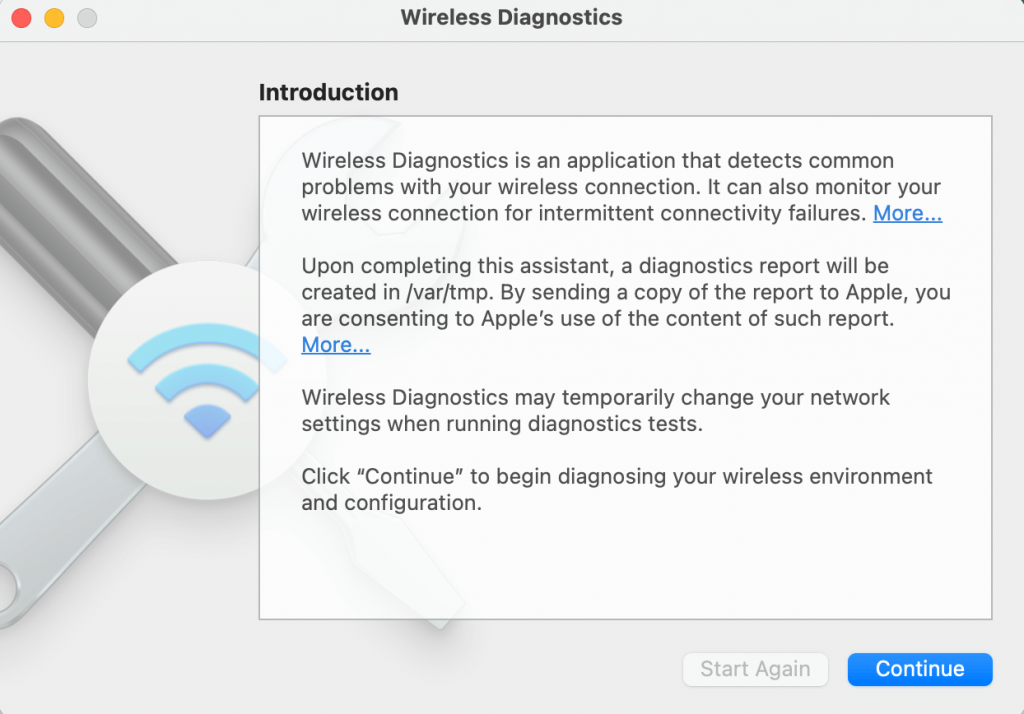
The ‘Wireless diagnostics’ tool will help troubleshoot Wi-Fi connectivity problems. Apple makes the ‘Wireless diagnostics’ device to provide Mac users with a solution to their Wi-Fi issues.
- Wireless diagnostics tool
The native diagnostic tool will help you fix recurring issues swiftly and efficiently. To properly use the wireless diagnostics tool, follow these steps:
- First, tap on the Wi-Fi network that often disconnects
- To open wireless diagnostics, press the ‘option’ key and simultaneously select ‘Wi-Fi’ from the menu bar
- Follow the onscreen steps to run the diagnostic test and click ‘continue’
- The wireless diagnostics test result will show the potential reasons for your lousy Wi-Fi connection, including the signal quality, level of noise your Wi-Fi network projects, transmission rate, etc
- Your network settings may temporarily alternate while the test is running
- Renew DHCP lease and set up a location
The dynamic host configuration protocol (DHCP) is a helpful feature that assigns all your devices their unique IP addresses.
However, at times the automatic location feature malfunctions. Therefore, setting up a DHCP lease becomes essential to determine the right location for traffic.
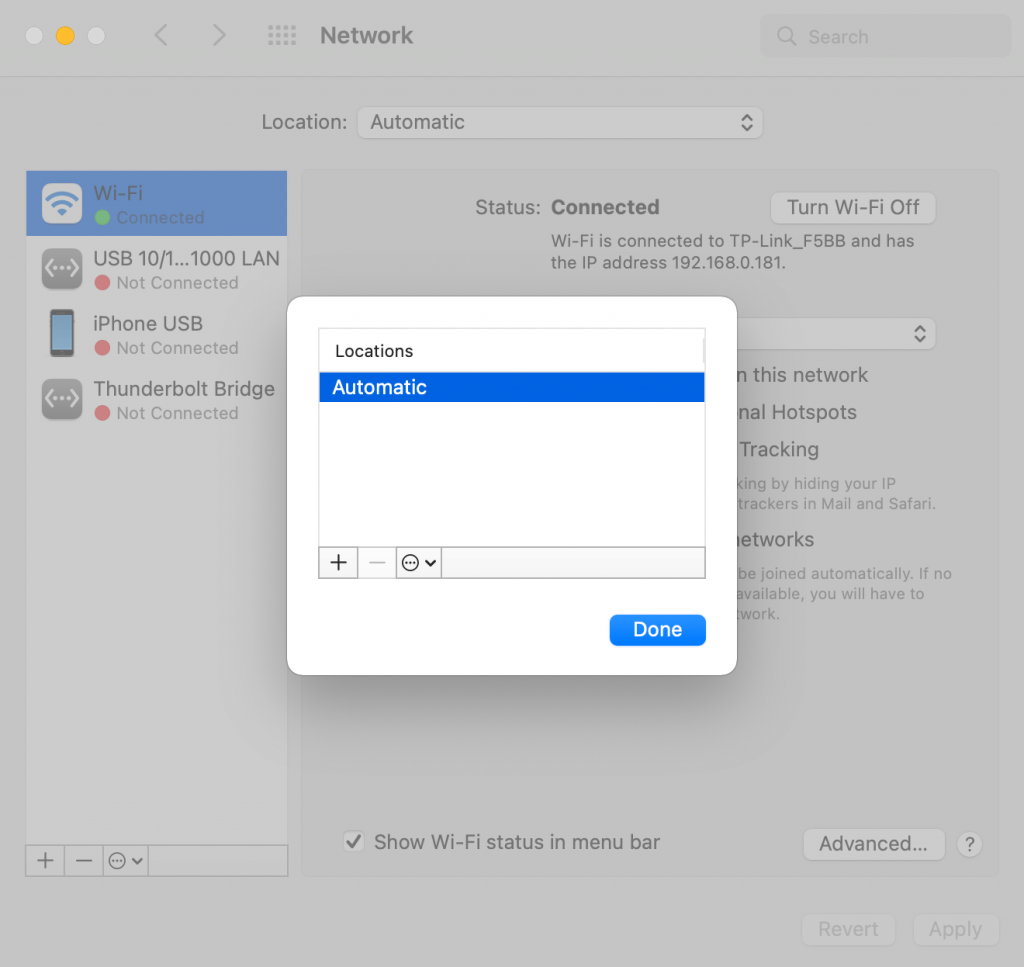
- Change location
To change the location of your network, follow these steps:
- Open the system preferences app and go to the ‘network’ panel
- At the top, look for the ‘locations’ tab and click it to view the drop-down menu
- From the menu, select ‘edit locations’ and then tap the ‘+’ button from the dialogue box
- You can then name your location to whatever you want
- DHCP
To renew your DHCP lease, follow these steps
- Once the location sets up, exit the ‘locations’ dialogue box by clicking ‘done’
- You will see the ‘No IP address’ sign in the Wi-Fi status menu
- Go the the ‘Advanced’ tab and click on the ‘TCP/IP ‘ tab
- Then tap on the ‘Renew DHCP lease’ button and select a new IP address for your Mac Wi-Fi
- Lastly, open a web browser and see if the wifi network is working
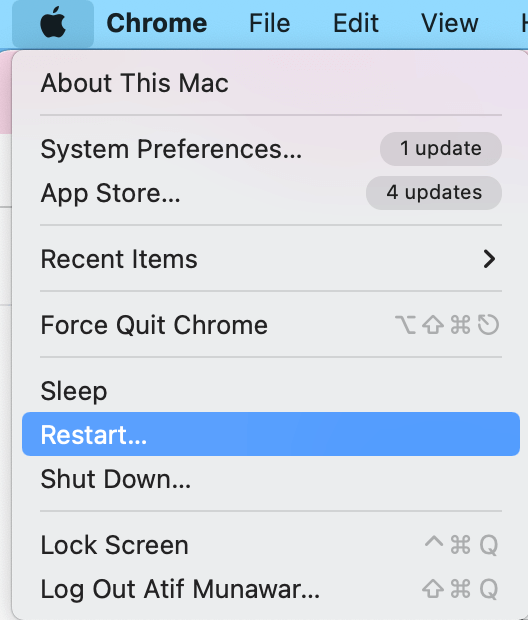
- Switch off your Mac
Usually, a malfunctioning wifi connection is due to minor software glitches and bugs. If the internet connection is disconnecting again and again, try restarting your Mac. To do this, follow these steps:
- Tap on the Apple logo in the Apple menu bar on top of the screen
- In the drop-down menu, select the ‘restart’ option
- Your Mac will turn off and turn back on in a few minutes
- Afterward, check if the Wi-Fi connection establishes automatically
- If this quick fix doesn’t work, follow the other methods mentioned down below for a significant troubleshoot
- Disconnect Wi-Fi network
You can fix a lousy Wi-Fi network by removing and re-adding it. In addition, it troubleshoots any minor connectivity issues between your Mac and the Wi-Fi router.
- Disconnect wi-fi
To disconnect your Wi-Fi connection, follow these steps:
- Open the system preferences app and select the ‘network’ section
- Then click the Wi-Fi tab and afterward press the ‘Advanced’ button
- Please tap on the disconnecting network and click the minus icon to remove it
- Your device will remove that Wi-Fi connection.
- Or, you can click on the Wifi icon in the status bar and choose ‘forget this network’ after selecting the Wi-Fi connection
- To delete multiple networks at a time, click the Command key and establish the Wi-Fi networks
- Then tap ‘Apply to all’ and click the minus icon
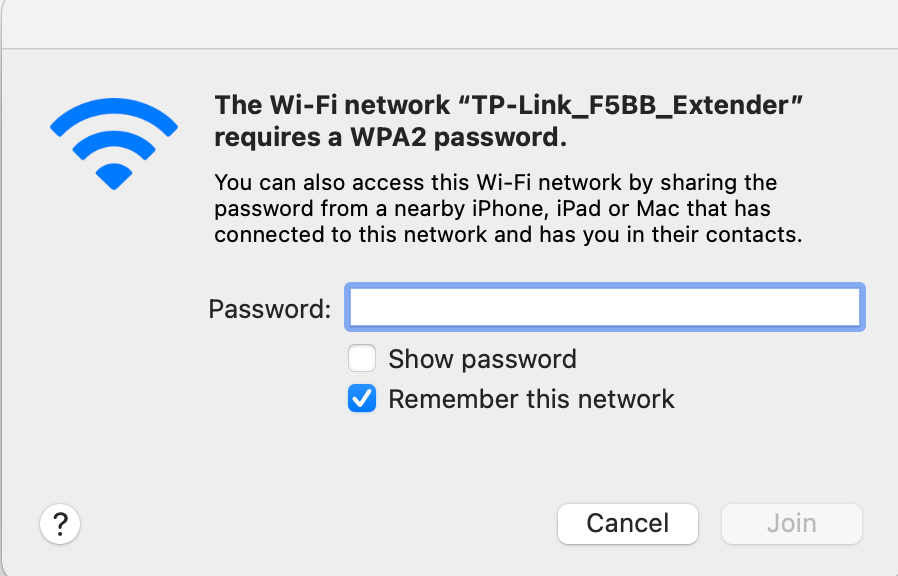
- RECONNECT wi-fi
To re-join the forgotten network, follow these steps:
- Open the Mac Wi-Fi section by clicking on the Wi-Fi icon, then tap on the Wi-Fi network you want to connect
- Add the connections password and press ‘connect’
- Also, tap on the ‘automatically join’ option to prevent the Mac asking from asking for the Wi-Fi password each time
- The Wi-Fi connection will get established again. Use it for a few hours to see if the network works appropriately or keeps disconnecting again
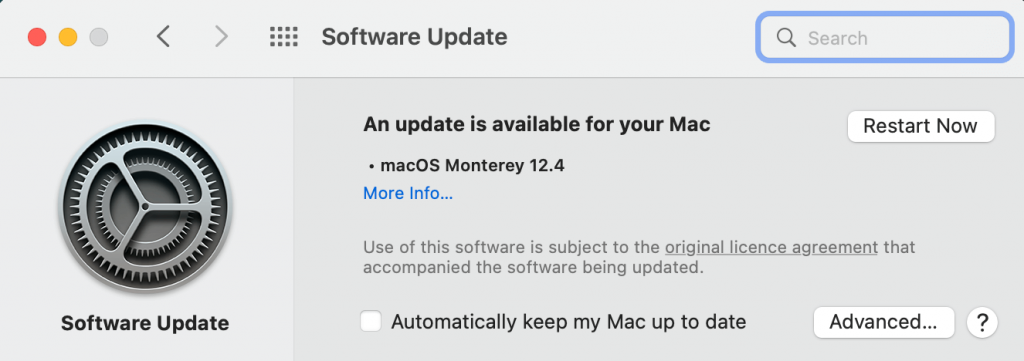
- Update the operating system
If your MacBook Pro or the MacBook Air are disconnecting from a Wi-Fi network for no apparent reason, a macOS update will likely fix this glitch. Apple Inc regularly updates its devices to add new features and fix software glitches.
To update your Mac, follow these steps:
- Tap on the Apple logo and then tap ‘system preferences’
- Select the ‘software update’ tab and look for the available update
- If any new update is available, click on ‘update now’
- Please wait for it to download, and your Mac will restart
- After the update, check if the Wi-Fi problems fix
- Disconnect USB C devices from the Mac
Specific USB devices can emit signals disrupting the Mac Wi-Fi signal quality. To fix the issue, try temporarily disconnecting the USB and all the other devices from your Mac.
If you have connected USB hubs to your Mac, they can also mess with the device’s Wi-Fi port. Try removing all the USB devices one after the other to reset the Wi-Fi network.
Then, check if the Wi-Fi signal quality improves. External devices can sometimes have data emissions that can affect the overall Wi-Fi network’s performance. You can again reconnect the necessary USB devices after the Wi-Fi issue is fixed.
- SMC settings
If your MacBook Pro has recurrent Wi-Fi problems, try reenabling the SMC, PRAM, or NVRAM to fix the Mac Wi-Fi network problem.
To reset the system management controller, Mac users can follow these steps:
- Shutdown your Mac by clicking on the ‘shutdown’ option in the Apple menu
- After the Mac sleeps, remove the power supply to the laptop
- Wait for a few seconds, then put the power supply back on
- Stand by for a few more seconds, and then press the power button to switch the Mac back on
- PRAM/NVRAM Settings
To reset the parameter RAM (PRAM) or the non-volatile RAM (NVRAM) settings, follow the steps given below:
- Switch off your Mac by tapping the Apple icon and then clicking ‘shutdown’
- Then switch it back on and simultaneously keep pressing the ‘Command, Option, P, and the R’ keys
- Hold the keys for a few seconds (ideally 20 seconds), and in that time, your Mac will reset and restart
- Lastly, after the Mac turns on, check if the wifi problems fix
- Rearrange DNS server
The domain name server (DNS) helps change the IP addresses to readable and accessible domain names. It provides users ease of internet use. But, sometimes, a DNS server doesn’t perform its function, which causes connectivity issues.
To fix this, you can use third-party servers like Google DNS, Cloudflare DNS, or Namecheap DNS. It will provide a quick and easy solution to the Mac Wi-Fi connectivity issues.
To change the DNS settings and utilize Namecheap public DNS, follow these steps:
- Open system preferences, then select the Network tab and tap on Advanced
- In the new window, tap the ‘DNS tab located next to the TCP/IP tab
- Lastly, press the ‘+’ icon at the bottom of the screen and add the IP address of Namecheap Public DNS as a new DNS server, then press ‘done’
- The IP address for Namecheap is: 198.54.117.10
- Switch off the router
Restarting the modem is an easy fix if the Mac Wi-Fi keeps disconnecting. It will also fix any signal issue caused due to modem malfunction. To restart the router, press the on/off button on the router.
Once the router stops blinking, press the on/off button again to restart it. Also, reset the router settings to the 5GHz band to increase signal strength. This method is a quick fix for when all other troubleshooting steps fail.
- Switch off Bluetooth
If your Mac keeps disconnecting from the Wi-Fi, it can be because a Bluetooth connection disrupts the signals. It can decrease the transmission rate OF Wi-Fi signals, resulting in Mac disconnecting from its network repeatedly.
To turn off the Bluetooth, follow these steps:
- Open the Control Center from the Mac status bar
- Press the Bluetooth icon, and it will switch off
- It will also turn off the Airdrop feature
- Check the Wi-Fi dropping issue to see if this fixes it
- Use a Wi-Fi extender
You can fix some Wi-Fi issues by setting up a Wi-Fi extender. This device catches the Wi-Fi networks’ signals and boosts their traveling capacity. As a result, the Wifi signal’s quality improves, and the range of signals also increases.
To improve the Mac Wi-Fi network channel, buy a good quality network extender and set it up. You can then choose a Wi-Fi network and connect the extender to it through a cable or wirelessly. It will drastically improve the ‘Wi-Fi keeps disconnecting’ prompt.
- Change router’s location
The wifi router is a physical device with a limited signal capability. It can transfer and receive signals from a set length.
Therefore, the location of your router is vital for good Wi-Fi signals. If the Mac wifi connection keeps disconnecting, try changing the router’s location.
Bring the modem near your Mac, or try moving your laptop setup near the router, whatever is more manageable. Staying closer to the router will fix the lack of signal strength problem due to which wifi keeps disconnecting from a device.
Also, remember never to put your router close to large metal surfaces, as these can also disrupt the Wi-Fi network’s signals. Keep your router farther from other network routers to minimize the radio waves from the nearby networks disrupting your connection.
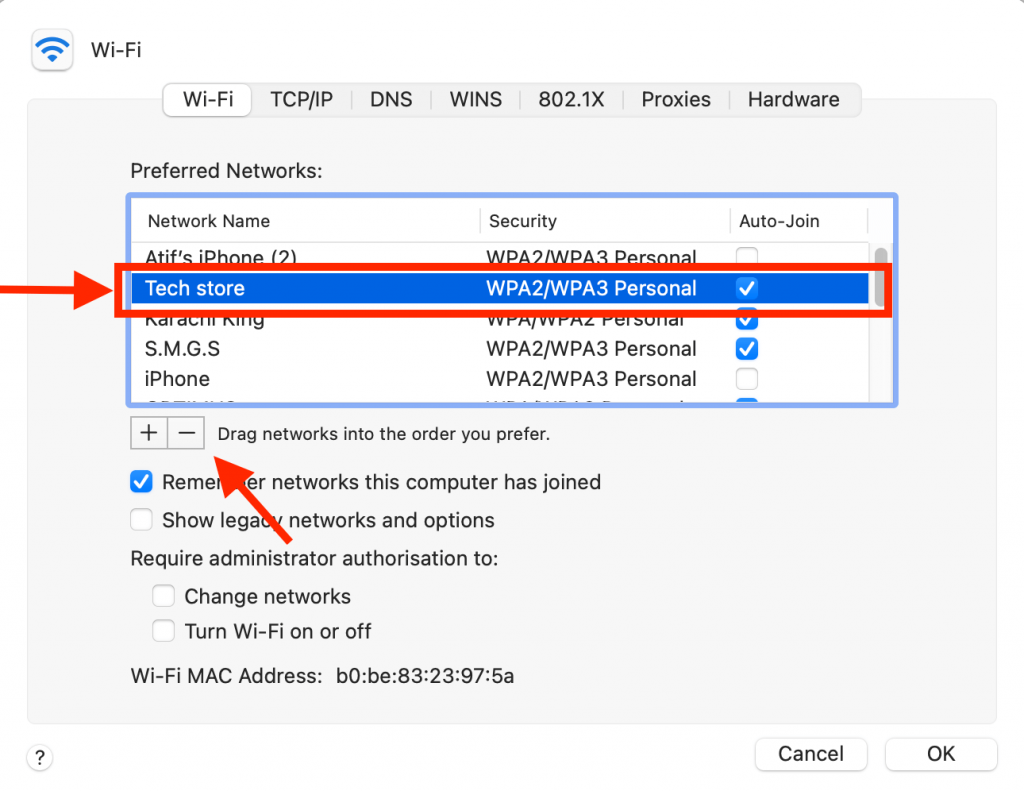
- Arrange the Network Priority
If your Wi-Fi keeps disconnecting, you can set the network priority on your Mac. It will help tackle the low signal issue. To configure network priority, follow these steps:
- Open ‘System preferences’ then click on the ‘Network’ tab
- Then select ‘Wi-Fi’ and tap on the ‘Advanced’ tab
- In the ‘Preferred Networks’ window, press the main Wi-Fi network and slide it to the top, and click ‘ok’
- It will prioritize the selected Wi-Fi network when connecting to wireless networks
Conclusion
Almost every electronic device emits signals, whether wireless phones or USB devices. Therefore it is vital to stay as far away from the neighbor’s network as possible to prevent Wi-Fi problems on your internet.
With each passing day, the internet is connecting more and more people. In addition, work-from-home jobs are also on the rise. Hence it becomes crucial to have a good and stable internet connection.
If your Wi-Fi ever malfunctions, come back to this article for some easy and quick troubleshooting ideas.